
As specialized software applications for every conceivable task become commonplace, onboarding tends to lag behind. You start a new gig, and if there’s new software to be learned, you’re pretty much left to your own devices to get up to speed. And when it comes to Microsoft Word, it’s so ubiquitous that if a job posting doesn’t specify experience and fluency with it explicitly, you can just assume that’s expected of you. In short, no one is going to teach you how to use Word.
If you have a passing familiarity with UX principles though, you know that the tools that do things we need to do every day can and should be designed in such a way as to make it easy to get up and running the first time you use them. And for all my complaints about it, Word does this pretty well. If the last thing you wrote an article on was a manual typewriter, Word shouldn’t pose any insurmountable usability hurdles.
The flipside of this situation is that there are thousands of features built into Word that most people don’t explore, and never learn to use. So today I’m going to show you a few Microsoft Word tips that have helped me become more efficient in my role as a freelance copywriter – where efficiency is a pretty high-value commodity.
This is not an exhaustive review of the latest version of Word. Many of these features have been built into Word for years, and you should be able to access them in whatever version you’re currently using, back to about Office 2010. I should also point out that I’m on a Mac, but most of these features are the same on both platforms – they might just be hidden in different places.
Default settings
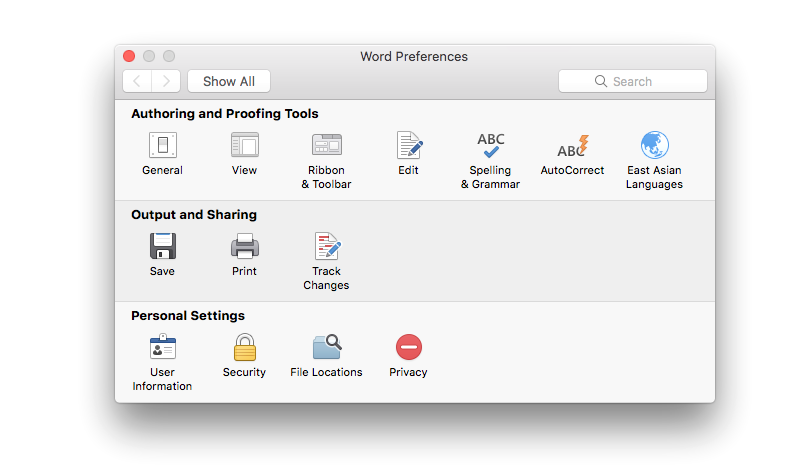
Whenever I start working with a new Word installation, I go through the preferences and adjust a few of the defaults. The following can be found under Word > Preferences.
Editing
Under Edit, I typically turn off:
- Drag-and-drop text editing because I never use it, and hate when words get moved around my drafts by accident
- Select entire word when selecting text which otherwise makes it difficult to correct spelling without retyping the entire word
I set insert/paste pictures as “square,” which just makes the most sense to me, but I try to avoid using Word as a layout tool.
Spelling & Grammar
Under Spelling & Grammar, I leave spellcheck on because I have nothing to prove, but I turn off all Check Grammar options because I’m not going to let an application tell me how to write.
Autocorrect & AutoText
Autocorrect is something that will evolve as you work, but it’s great for dealing with counter-intuitive brand and trademark requirements. If you’re always forgetting that product name that insists on CamelCase, create an autocorrect rule for it and never worry about it again.
AutoText has its uses. You could, for example, use it for boilerplate legal, so you could type in “Brand X legal” and have it automatically replaced by a legal disclaimer.
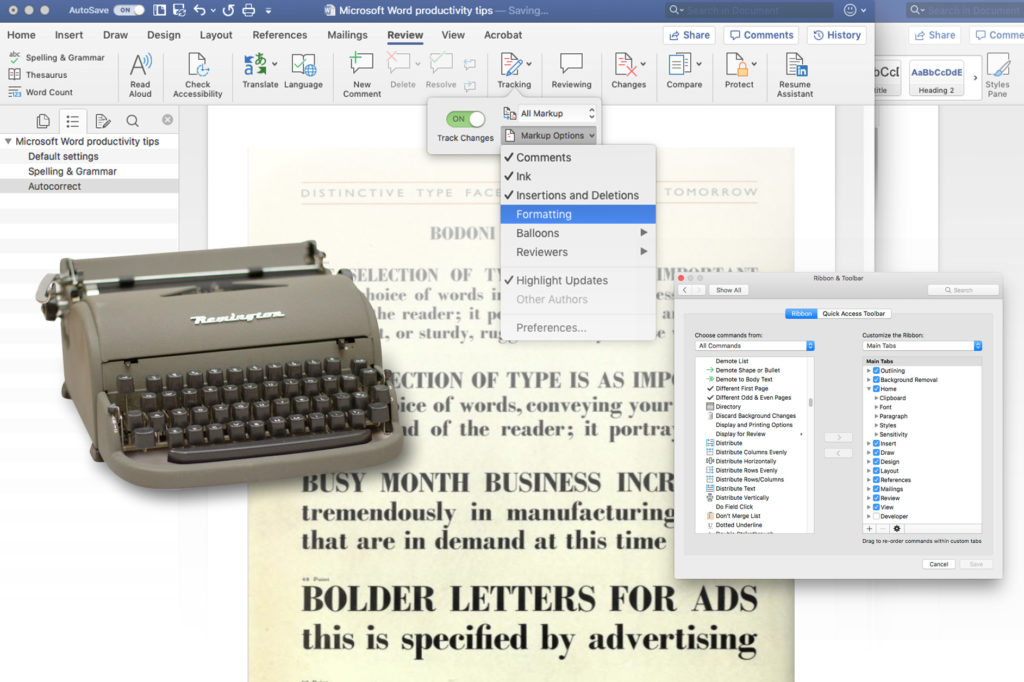
Tracking changes
In our line of work you’ll spend a lot of time slogging through Tracked Changes. You have a lot of options for how you’d like these to appear, but keeping in mind this feature is as much for your clients and partners as it is for you, it’s best to leave the defaults as they are, so they don’t confuse anyone (i.e., everyone) else.
The one exception I would make would be to turn off the Formatting option in Track Changes. You can do this either in the Preferences menu or in the Review tab. I have this set as default for documents I create, and any document that crosses my screen will get this option set for it. No one needs to see what indentation level that paragraph was set to, or who changed the proofing language. And I certainly don’t need to go through and accept all those changes manually. Seriously.
Customizing the ribbon
Having the tools you need close at hand can be a big boost to your productivity. Word lets you do this in a few ways. The most powerful is the Toolbar, which is fully customizable. For example, if you look on the left end of your default home ribbon, you’ll see a cluster of copy and paste tools that you never touch – because everyone knows the hotkeys for copy and paste by muscle memory now. So why not start by getting rid of those?
Deleting groups
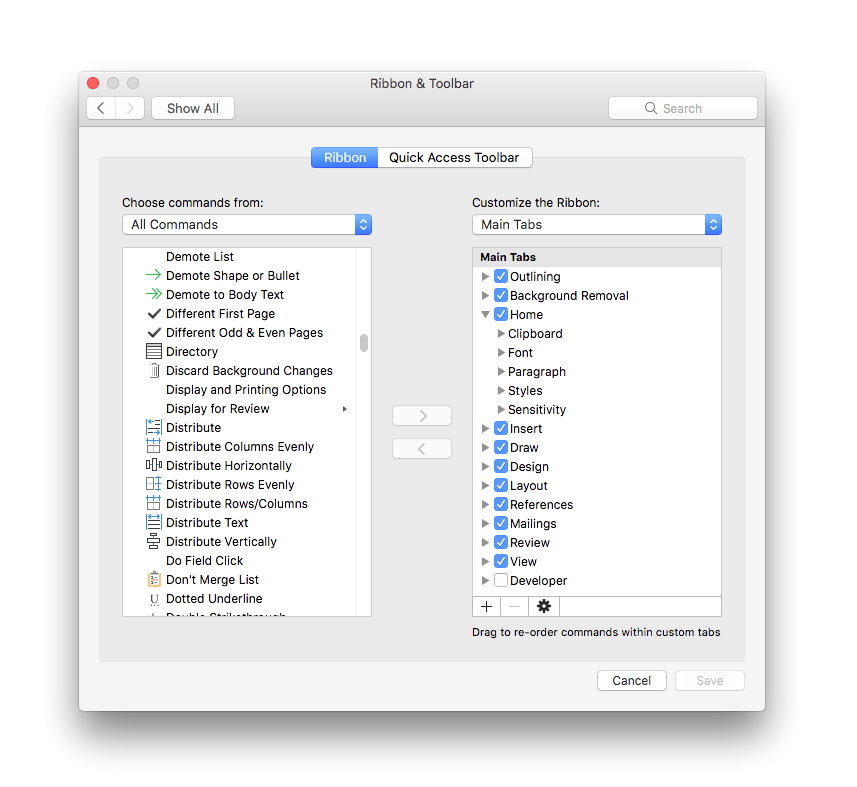
Open up your preferences and go to Ribbon & Toolbar. Select Ribbon from the two options, and select Main Tabs in the right column. Click the twisty beside Home to view all the commands in the Home ribbon. Select Clipboard and then hit either the left pointing chevron in the middle column, or the minus button. When you save this setting, the copy and paste options will be gone. Now there’s more room for your own custom groups.
Adding groups and commands
Don’t worry, if you start to miss that format paintbrush later you can always add it back in, in very much the same way. First you’ll have to create a custom group in your ribbon. Hit the plus icon at the bottom of the right column and select New Group. Your new group will appear in the list. You can rename it by clicking on the gear icon next to the plus/minus icons. With that new group selected, look for Format in the left column under Popular Commands. Once you’ve found it, hit the right pointing chevron.
Now that you know how to customize the Ribbon, you can personalize your toolset so everything you need is right in front of you. I use a lot of tables when I’m writing for applications, so I put a few table tools in there. And when I’m working on a PC I can never remember the Alt-code combinations for symbols, so I put the Symbols menu in my home ribbon.
Taking (and making) shortcuts
Another way to turbo-charge your productivity in Word, and occasionally mystify your co-workers, is by customizing your hotkeys, or shortcuts, in Word terminology. I once parlayed a thorough knowledge of Quark hotkeys into a full-time art director position at a national ad agency. So imagine what some Word shortcuts could help you do in a day at the content farm.
Don’t assume that the hotkeys you can see in the main menus are the only ones that exist. You can add a hotkey to just about any command in Word, and you can also change the defaults. Remember that format painter that we moved around a few paragraphs back? Let’s create a shortcut for it.
Creating a new shortcut
On your Mac, go to the Tools menu and select Customize Keyboard. The way this window is laid out might make you think that you should know what category your command should be located in, and what it’s called. It’s a fool’s errand. The naming conventions are very inconsistent, and there are hundreds of commands to sift through. So under Categories select All Commands and then type “format” into the search field.
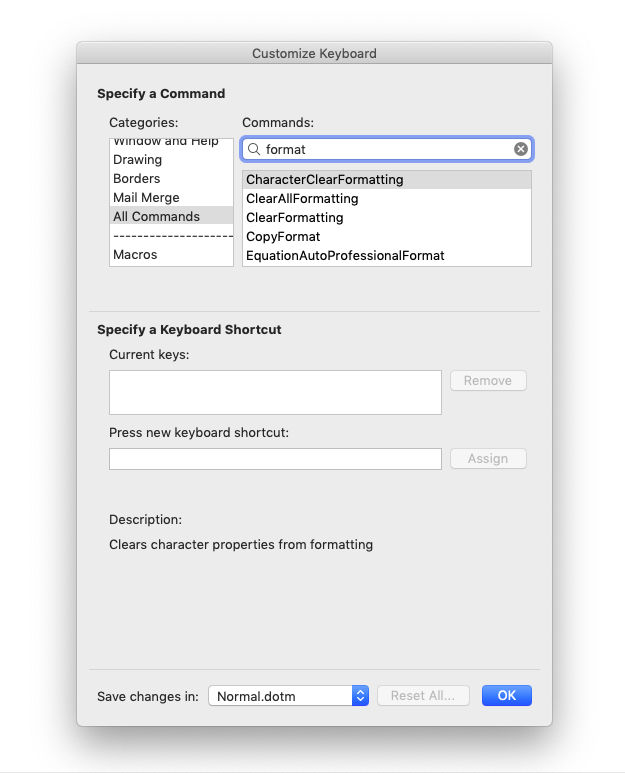
You’ll notice “format” shows up in a lot of commands, but the one we’re looking for, CopyFormat, is near the top. Select that in the commands pane, and Word should tell you that it already has a shortcut, Command+Shift+C. If you want to create a new shortcut, tab down to the “Press new keyboard shortcut” field, do as the sign says, and hit Assign.
If the new shortcut you’ve chosen is already in use, Word will warn you. Try using different modifier combinations (control, option, command and shift) until you find one that’s available.
At the bottom of this menu, you’re given the option of where you want to save your changes. The Normal.dotm template is the obvious place, as that is the underlying template for all your new documents (we’ll talk about templates more in another post). Then hit OK. And you’re done!
Go forth and be productive
I hope you’ve found some of these tips helpful and not completely obvious. Next time we’ll talk about style sheets, which is a big topic that seems kind of dull at first but has some interesting surprises. Feel free to add your favourite tips in the comments.